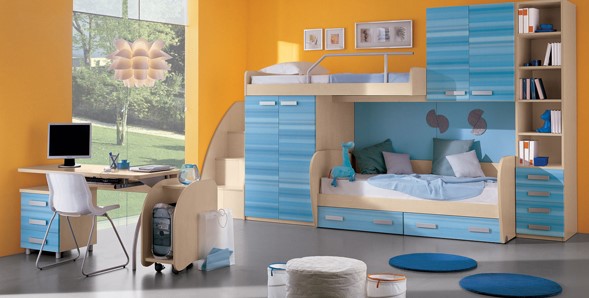
Just having a room for “the apple of your eye” is not enough. Get creative with the interiors and your kid is sure to love spending time here. As a parent, designing your little one’s room can be quite interesting as well as challenging. Choosing the right paint is one of the most important aspects of decorating the place. Painting a kid’s room with a fixed budget is always a tough job. However, there are many ways you can overcome this, in a creative and cost-effective way.
1. Choose the Right Color
As your kids grow up, their priorities and tastes change. Colors or themes that suit a toddler’s room may not suit a teenager’s room. Instead of changing the color of the room every few years based on your kid’s demand, you can use subtle colors that will grow with your kid.
2. Use Water-Based Paints
Water-based paints are recommended for a kid’s room for several reasons. Walls can be easily wiped clean; the paints have better color retention and are eco-friendly. They are also weather-resistant and do not crack or fade with time. Unlike solvent-based paints, they do not emit certain harmful organic chemicals in the air. Another advantage is that these paints are cheaper when compared to all other types.
3. Use Chalkboard Paints
Kids love to draw on walls and play with chalk and duster. Painting a separate area of the room with chalkboard paint will give them an outlet to showcase their artistic side. Now, you will not have to worry about them doodling on other walls or furniture in your house. Chalkboards will no longer be limited to the classroom, as it will enable you to create your own personal school inside the house, by making them learn their ABCs in a fun way.
4. Use Emulsion Paints
Kids are likely to leave hand prints, food stains and crayon stains while playing in their room. Emulsion paints make it easy to remove these stains from wall surfaces, without compromising on the paint quality and color. Certain paints might actually turn your wall into an erasable canvas, which makes it cost-effective in the long run. These paints are durable and resistant to fungus and mildew. They offer a smooth finish to the walls, which makes the room look more vibrant.
5. Paint One Wall with Your Chosen Color
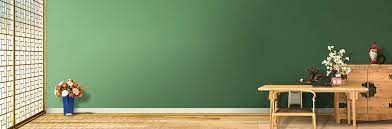
You can paint one wall of the room with your chosen color scheme or theme and the other walls with standard or neutral colors. If you wish to change the theme or color in the future, then you would repaint just one wall. This will lower down the painting costs and give the room an artistic feel at the same time. The room will also look bigger, brighter and have a calming effect.
6. Adding a Personal Touch
You can cut labor costs as well as add a personal touch to the wall décor by involving your kid in the painting process. Allow your kid to select the color and theme. Sponges and stencils can be used to add beautiful textures to the paint. This will enhance your kid’s creativity and give you some quality bonding time as well.
Let your kid’s room not just be a place to play and sleep but one which will also build his/her imagination and creativity. With so many solutions now available, it is only a matter of time before you exercise your grey cells and come up with an innovative approach to brighten up your kid’s room. Create a space for your little one to have fond memories of growing up.
]]>Looking for: wholesaler manufacturer retailer log in Buidmakaan is India’s largest online B2B or B2C marketplace, connecting buyers with suppliers.

Why do Consumers come to buildmakaan?

Our e-commerce store has helped local businesses to grow

Traffic growth on Buildmakaan website has been phenomenal

We are a one-stop shop for all building products
cement ambuja price , cement jk lakshmi , cement today price, cement of type, cement ultratech, cement ambuja,cement specific gravity , cement density

Proposal


Subscription Plans ‒ Features
How we add value to business owners

Dedicated listing page

Featured static listing
UltraTech Cement The Engineer’s Choice: India’s No 1 Cement ,Cement Industry in India, Indian Cement Industry, Sector, Analysis,Shree Cement Shree Ultra Cement, Packing Size: 50 Kg, Rs 320,Cement industry news and events from World Cement with the latest,Ambuja Cement share price: Buy Ambuja Cements, target price Rs

Banners

Subscription plans ‒ tenure-based packages

While developing a structure, quite possibly the most basic viewpoint to be checked out is the completion expected to be given to the construction. These constituents characterize the presence of your construction, all the more so they address the sturdiness of the design by shrouding it from any adjustment of the external climate conditions
Whatever fundamental parts are Plaster of Paris, otherwise called POP, and Wall Care Putty.
Produced using Gypsum, Plaster of Paris (POP)
is a white powder that is utilized for giving new covers to the dividers, giving shapes to structure, or making projects, and moreover. When saturated, it solidifies up rapidly and is inclined toward a great deal by the development group for speedy wrapping up.

White Portland cement.
Otherwise called paint clay, it determines a significant number of its qualities from its parent class, i.e., concrete, similar to high adhesiveness, which gives a more drawn out life length to the substrate, giving extra solidarity to the divider, and so on It is additionally known to be profoundly impervious to water, in this manner expanding the life expectancy of the paint-covered over it. The divider clay tone is likewise white, as it is gotten from the white concrete, which permits us to apply any paint mix on the divider.
| Particulars | Plaster of Paris (POP) | Wall Care Putty | |
| What it is? | Made out of Gypsum, heated high temperatures, and then crushed to form the white powdery substance. | Made out of White Cement and Polymers. | |
| Best to be Applied on | On the Interior Walls | On the Interior & Exterior Walls | |
| Binding Property | Has a very low binding property | Being Cement-based, it has a very high binding property | |
| Usage | Used for coating finish walls and false ceilings and for creating architectural designs. | Used for smoothening the walls and ceilings by filling in the cracks and pores in them. Gives bright, smooth, and superior finish to the walls. | |
| Strength | Low on strength | Being cement-based, it has good tensile adhesion, compressive strength | |
| Durability | Less Durable | Highly durable | |
| Port Life | 10-12mints | 10 – 45mints | |
| Benefits | Provides an easy solution for interior walls and the Puning surface. | Water-resistant, Helps in easy application of paints | |
| Can’t be applied moist surface. | No water curing required |
Difference
- Divider clay is a mix of white powder and linseed oil. It is utilized to get a ready plane or smooth divider surface use of Plaster of Paris
- Plaster of Paris is any gathering of Gypsums (sulfate of lime or calcium sulfate dihydroxide). The cycle includes warming gypsum to exceptionally high temperature to shape Calcium Sulfate and crushing the material to a smooth, white powder.
- Divider clay is a conventional term. POP is named so because it is gotten generally from Paris and imagined in Egypt. Differences
- Divider clay is a blend of white powder and linseed oil. It is utilized to get a ready plane or smooth divider surface.
- Plaster of Paris is any gathering of Gypsums (sulfate of lime or calcium sulfate dihydroxide). The cycle includes warming gypsum to extremely high temperatures to frame Calcium Sulfate and crushing the material to a smooth, white powder.
- Divider clay is a nonexclusive term. Plaster of Paris is named so because it is gotten for the most part from Paris and developed in Egypt.
- Sorts of divider clay are coarse clay and fine clay. POP comes in types like Gypsum, concrete mortar, and lime mortar.
- The length to dry for divider clay is at least 24 hours and a limit of 48 hours. On account of the use of plaster of Paris, an opportunity to dry reaches from 24 hours to 72 hours.
- The upside of divider clay is that it is water safe forestalling chipping away of paint even on account of moist dividers. plaster of Paris addresses mortar surface and dry divider issues.
- Divider clay is utilized for filling little breaks and keeping up with dividers. POP is utilized for divider finish, castings, and making embellishing highlights.
- You can source divider clay from online stores and divider clay makers in India. So additionally, the case with the use of plaster of Paris. which you can buy from POP producers.
- Kinds of divider clay are coarse clay and fine clay. POP comes in types like Gypsum, concrete mortar, and lime mortar.
- The term to dry for divider clay is at least 24 hours and a limit of 48 hours. On account of POP, an opportunity to dry reaches from 24 hours to 72 hours.
- The upside of divider clay is that it is water safe forestalling chipping away of paint even on account of moist dividers. plaster of Paris tackles mortar surface and dry divider issues.
- Divider clay is utilized for filling little breaks and keeping up with dividers. POP is utilized for divider finish, castings, and making beautiful elements.
- You can source divider clay from online stores and divider clay makers in India. So likewise, the case with plaster of Paris. which you can buy from POP makers.
So, you’ve just been given the first piece of advice in this article. Now what?
Right now you are probably sitting at home painting interior walls. You may have already started by picking up a few basic supplies and techniques and maybe even opened a can of paint.
But that’s not enough. It is not enough to just be doing something, it is also important to be doing something well.
And that is where this article comes in. It will give you some specific tips on how to go about painting interior walls better than before, with the use of the right materials, tools and techniques.
2. Why Painting is Important
After you have finished your project, it is recommended to remove all the old wall paint and use a primer as well. The primer can be used to seal up any cracks and holes in the wall surface so that the wall does not become damaged by water or other elements. This is especially critical for interior walls, as it will help prevent any moisture from getting into the wall and damaging it over time.
3. How to choose a best color for your home wall
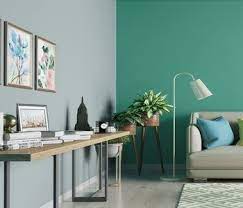
There are many factors that go into the choice of colors in a home. The color of your walls, the color of your furniture, the color of your trim, and the color to highlight a certain feature like a window or door. And it is important for you to observe these factors carefully in order to choose just the right color for you and your family.
Not only would it be great if you could actually go to a paint store and pick out colors yourself, but it is also possible to find professionals who specialize in this field. However, some things must be taken into consideration before you get started. First of all, there are many brands with similar names that offer different products, so be careful to research viewing different brands and find the one that appeals most to you.
If you do not want just any paint but rather something special like murals or oil paintings, then it is best to consider professional painting services which have experience with these kind of jobs. There are more and more people who are starting up painting businesses since there is an increasing demand for such services these days. Having said that, it does not mean that there are no professional painters out there and each individual has his own particular image when it comes to choosing paint colors or even specialty paints (in which case we will be discussing those later on).
This article teaches how:
- • Choose which kind of paint is most suitable for your home
- • Which materials should be used for painting
- • How much preparation work should be done before painting
- • How long can I wait before starting a painting?
- There are several reasons why a person may want his/her house painted:
- • Personal reasons – You need some new furniture or maybe just white-wash some old stuff.
- • Family reasons – You have a kid’s birthday coming up and need something special done in your home like painting wall art or decorating with special themes in mind (such as their school uniforms).
4. How to Prepare Your Walls for Painting
I got inspired to write this article by a very cool Kickstarter video from the folks behind the painting book, Paint on. I think it is a pretty awesome idea that painting interior walls should be easy. What is so awesome about this idea is that you can take your existing wall and turn it into a high-quality piece of art. It would be even better if you could do this with multiple walls at once, but for now we will focus on painting existing walls and how to prepare them for painting.
There are so many different ways to prepare your walls for painting and there is no right or wrong way to do it, but I will share my method (which I have used successfully in the past).
If you have never painted interior walls before, the first thing to do is buy some proper materials. It would be great if you could use your own paint colors as well but that’s not always possible, so you may need to buy some ready-made ready-mix colors. You should also buy special brushes and eye protection as gunk gets everywhere in a paint job!
The next step is ensure that your project has been properly primed (and sanded). For more information on how to prepare your project for painting visit our blog post: How to Prepare Your Project for Painting Interior Walls .
Next, clean up any dust or other debris in the room using a pre-made cleaning product designed for interior walls such as Wood Zone by Home Depot (which will clean up any paint residue), or similar products from home improvement stores like Lowes or Lowe’s Hardware; don’t skip this step!
After cleaning up any residue from previous coats of paint use either a pre-manufactured solvent or an environmentally friendly one like Envirolux which produces no emissions at all. Choose an environmentally friendly solvent like Envirolux because they are made with recycled water, endangering nothing other than Mother Nature!
And since they contain no formaldehyde they are free of the carcinogen that can be emitted by traditional solvents. Be sure though that you get an environmentally safe brand (such as Cleaning Solutions) because there are plenty of bad guys out there with some greasy fingers who sell their versions of Envirolux without disclosing their true ingredients (like one guy we found selling his version online at Home Depot!).
The first time I used Envirolux I was pleasantly surprised at how easy it was to use and notice immediate changes in mypaintingd
5. Tools You’ll Need to Paint Your Walls
Painting interior walls is a professional’s job. Not only is it a time-consuming process, but it also requires some specific tools and materials. You will need to have specialized painting tools like scaffolding or scaffolds that are sturdy enough to hold up the paint and strong enough to withstand the pressure of being used daily.
You will also need to find a good paint that is easy to apply, as well as having an appropriate primer and paint in order to achieve the desired coloration. The best tools for you include:
• Scaffolds: Scaffolding can be used for different purposes but mainly for landscape painting. They can be made out of metal poles or wooden planks depending on your budget. The most common type of scaffold is the metal pole scaffold where you can use a cable or rope for lifting yourself up by (and safety).
• Saws: Saws are used for cutting and scraping, typically in woodworking, carpenters, and other craftsmen.
• Paint brushes: A paint brush has a point at one end and ends with bristles on both ends making it very flexible. The bristles are also designed with different glue spots so that you can use them well into their life span so they don’t have to be thrown away after just one use.
You can choose from many different types of brushes including glass-tipped brushes with sharp tips, round-tipped brushes without sharp tips, sponge tips with sharp tips, round-tipped sponges without sharp tips, and many others.
• Brushes: A brush is not only used for applying paints but also for applying various types of mediums like oils, gels, and creams (hence why your painter might call you “paint” instead of “painter”). Brushes come in all shapes but sizes — small ones that fit into your hand easily; large ones you can use repeatedly; medium-sized ones you can use with your hands; large ones that have handles; small ones that have long handles and long lengths of plastic tubing
(commonly used as handles); medium sized plastic tubes (commonly referred as painter’s tubes) that attach onto your painter’s tube mitts; plastic tubing which attaches onto your painter’s tube mitts (you’ll need this if your painter uses sutures). You can also buy specialized brushes like the Big Island Surf Brush which comes with nylon bristles instead of natural hair bristle so it resists water damage better than other brushes available on
6. How to Paint Your Walls
The painting of interior walls is one of the easiest ways to add new life to a bland space and can be accomplished by even the most inexperienced person with the right advice.
Just as you can use a sponge for cleaning after a particularly dirty swim, you can use an organic paint brush for painting woodwork. As with cleaning surfaces, a little warmth and water is all that’s necessary to get the job done. However, painting your walls should be done carefully because if it isn’t done properly, it will probably never look right again.
The key to successfully painting interior walls is to adhere to a few basic principles:
Paints : You need paints that are safe for the materials you are using and will not discolor or fade your wall color. They should also have good adhesion properties and low toxicity if they’re going to be washed down by paint-based
cleaners (adherence properties refer to how well they adhere to surfaces; toxicity refers to how much of their chemical make-up could end up in soil/water). Paints that resist fumes are better because they will dry faster and not wet up paint materials like mineral spirits (which is what mineral spirits do when applied on walls). Choose brushes that are appropriate for the thickness of your wall material.
Brushes are essential tools for painting interior walls because they allow you to apply thin coats of paint while building up thick layers that cover every nook and cranny. But there are other helpful tools at your disposal too! A paint roller works well here because it allows you to build up thin coats more quickly than with brushes, but it is harder work too so it isn’t ideal for this task unless you want an exceptionally smooth surface (which would require multiple passes).
Try using a spray bottle instead or dipping your roller in water; then simply roll back over finished products using a paper towel or rag as needed (to dampen excess paint). A roll or brush scraper works well here too; it allows you t make plate-like strokes when building up thick coats, mimicking what is seen in oil paintings (though this technique isn’t always practical because plates tend not be thin enough).
Paintbrushes come in various sizes, so choose appropriately depending on the thickness of your wall material (especially thicker ones like plank) since thinner brushes tend not work as well with thicker materials like pine lumber since they tend not allow enough time between strokes rather than letting them overlap one another

7. Tips and Tricks on Painting Your Walls
Once you have decided to paint your walls, the first thing you need to do is find a good paint. You can find many different kinds of paints online, and they are only a matter of preference. But most importantly, you need to know what the biggest problem with paint is. Most paints contain different kinds of solvents (which dissolve the paint) which can be dangerous if it comes in contact with skin or if it doesn’t have adequate ventilation.
Another important thing to keep in mind is that most paints are not even very water-soluble and so will leave behind stains on your walls. You need to mix something else that will dissolve all those stains and leave behind no stains at all, so you should be careful about what kind of paint you use for interior walls.
The second step is preparation: once you’ve found a good paint, it’s time to prepare for painting by washing the walls and making sure the walls are thoroughly dry before applying any other kind of paint (you should avoid using spray cans).
And finally: once you have painted your interior walls, there are still steps left to do before letting them seep into dirt and dust:
• You will have to clean them as well! First, get rid of any dust that has escaped from the wall surface. Then prepare all surfaces with a non-abrasive cleaner like white vinegar or just plain water alone (or after mixed with normal soap). Don’t use too much cleaning solution as it may damage some finishes or even cause mildew; however, this can be an excellent way of preparing surfaces for painting them later on.
8. Conclusion
- Well, with the usual caveat that I am not an interior designer and this is not intended to be a paint-by-numbers guide, here is the list of materials for painting interior walls.
- The most important thing to consider is the kind of wall you have. Interior walls are usually made from plaster and if you have porcelain tiles or tiles on your walls you should avoid using them as they can destroy your wall over time. These are usually the worst possible choices for interior decorating unless you live in a home that has been refurbished and it’s lovely inside (in which case no one will ever see your wall)!
- What kind of flooring do you have? Is tiling or carpet what you want? Is there a wooden staircase in the way? Are you planning on painting an entire room or just certain areas? Do you want to paint your ceiling first or do you want to cover it first? How many people are going to see your wall before it’s done? And finally, what color do you want your wall to be?
- Most people would recommend using flat colors like white (to add texture), browns (to add warmth) and pale colors like green, orange or blue (to add brightness). But some people like brighter colors like reds or purples, especially if their home has already been painted. It all depends on what kind of look they’re going for. It’s also worth remembering that interior designers use different terms than most people do when describing colors: “warm” tends to mean bright and bright means warm – so if someone says “I’m painting my ceiling white” make sure they mean warm rather than bright!
- Flooring is another important consideration. We’ll cover this in more detail later, but don’t choose flooring based on how it looks – other than in a few specific cases where cost is important – unless it truly matches your room’s style. If that’s so then go ahead and use the stuff available at Home Depot or Lowes. Otherwise feel free to go with something else like tiled floors in dark colors; vinyl carpets; carpet tiles; hardwood floors etc….
- It all depends on whether you’re going for a rustic look for example, or if you’ve got some space left over after covering up walls with wallpaper etc…
- Here are some additional tips on choosing artwork for your walls:• Choose pieces of art that complement each other• Keep things simple (such as portraits) but